安装Hugo
在本地安装 Hugo,
brew install hugo
安装成功后查看Hugo 版本 hugo version
➜  blog git:(main) hugo version
hugo v0.91.0+extended darwin/amd64 BuildDate=unknown
创建一个site,site其实就是一个博客地址 : hugo new site test
➜  workspace hugo new site test
Congratulations! Your new Hugo site is created in /Users/mac/workspace/test.

Just a few more steps and you're ready to go:

1. Download a theme into the same-named folder.
   Choose a theme from https://themes.gohugo.io/ or
   create your own with the "hugo new theme <THEMENAME>" command.
2. Perhaps you want to add some content. You can add single files
   with "hugo new <SECTIONNAME>/<FILENAME>.<FORMAT>".
3. Start the built-in live server via "hugo server".

Visit https://gohugo.io/ for quickstart guide and full documentation.
创建好之后进入到 test目录中会发现子目录和config.toml文件
➜  test ls
.
├── archetypes
├── config.toml
├── content
├── data
├── layouts
├── static
└── themes
- archetypes : 文件格式描述的配置,比如说,你创建了一个.md(Markdown)文件,渲染规则配置就存储在archetypes文件夹中,当然你也可以配置自定义的文件格式
- config.toml :是配置文件
- content : 目录存储你的博客文章
- static: 存储所有静态内容:图像、CSS、JavaScript 等。当 Hugo 构建站点时,静态目录中的所有资产都将按原样复制。
- themes : 存放主题
创建Github 仓库
- 创建一个<username.github.io> 的仓库用于存放blog内容。
- 在本地 初始化仓库并初始化main分支(很重要,因为分支名称要和下面的
Github Action配置对应起来,如果分支名称不一致触发不了GitHub Action) - 并将 remote url 定向到刚刚创建的<username.github.io>
下载主题
Hugo有大量的主题可供选择 :https://themes.gohugo.io/,我这边使用的是even这个主题。
git clone https://github.com/olOwOlo/hugo-theme-even themes/even
将themes/even/examplesite/config.toml 迁移到自己的博客目录下,替换掉默认的config.toml
mv themes/even/examplesite/config.toml ./config.toml
然后根据自己的需要对config.toml中的内容进行替换,配置文件中每项都有中文注释,还是挺简单的。
然后可以在博客目录执行命令即可创建一个博客。
hugo new post/xxx.md
到这里你可能会看出来这是一个 git 仓库的submodule,因为这个主题仓库是在我们的自己维护仓库的子目录下。
所以这里要添加submodule
git submodule add https://github.com/olOwOlo/hugo-theme-even themes/even
配置 GitHub Action
在博客目录的中创建子文件夹.github/workflows 添加文件gh-pages.yml
name: github pages

on:
  push:
    branches:
      - main  # Set a branch to deploy
  pull_request:

jobs:
  deploy:
    runs-on: ubuntu-20.04
    steps:
      - uses: actions/checkout@v2
        with:
          submodules: true  # Fetch Hugo themes (true OR recursive)
          fetch-depth: 0    # Fetch all history for .GitInfo and .Lastmod

      - name: Setup Hugo
        uses: peaceiris/actions-hugo@v2
        with:
          hugo-version: 'latest'
          # extended: true

      - name: Build
        run: hugo --minify

      - name: Deploy
        uses: peaceiris/actions-gh-pages@v3
        if: github.ref == 'refs/heads/main'
        with:
          github_token: ${{ secrets.GITHUB_TOKEN }}
          publish_dir: ./public
          cname: yourwebsit.onlie # 你自己的域名, 如果没有,删除这一行
注意如果没有自定义域名的删除最后一行
使用Typora
每个喜欢使用使用Markdown来写东西的小伙伴都知道typora的大名,这里就忽略其介绍了。这里简单说一下配置图床。
我一般是通过在content/post/ 目录下直接通过typora编辑文章,然后通过git commit 到GitHub GitHub通过github action直接渲染出静态页面,非常方便。
配置图床
- 首先安装
picgo
yarn install picgo --cask
然后根据自己需要配置图床
图床有很多种选择,从GitHub,Gitee 到七牛云,阿里云OSS等等
我选用了腾讯云的,参考 配置方式
配置好对应配置之后执行选择对应的uploader即可
picgo set uploader
最后一步是在typora种选择upload操作
操作1 : 在插入本地图片后自动上传,并将链接链接到上传后图片的地址。
操作2 :使用对应的command : node picgo u 作为图片的上传命令
通过以上操作即可在编辑文章时自动上传图片。
自定义域名
随便在哪里买一个域名,现在各个云服务提供商对域名都有首年优惠,非常方便。
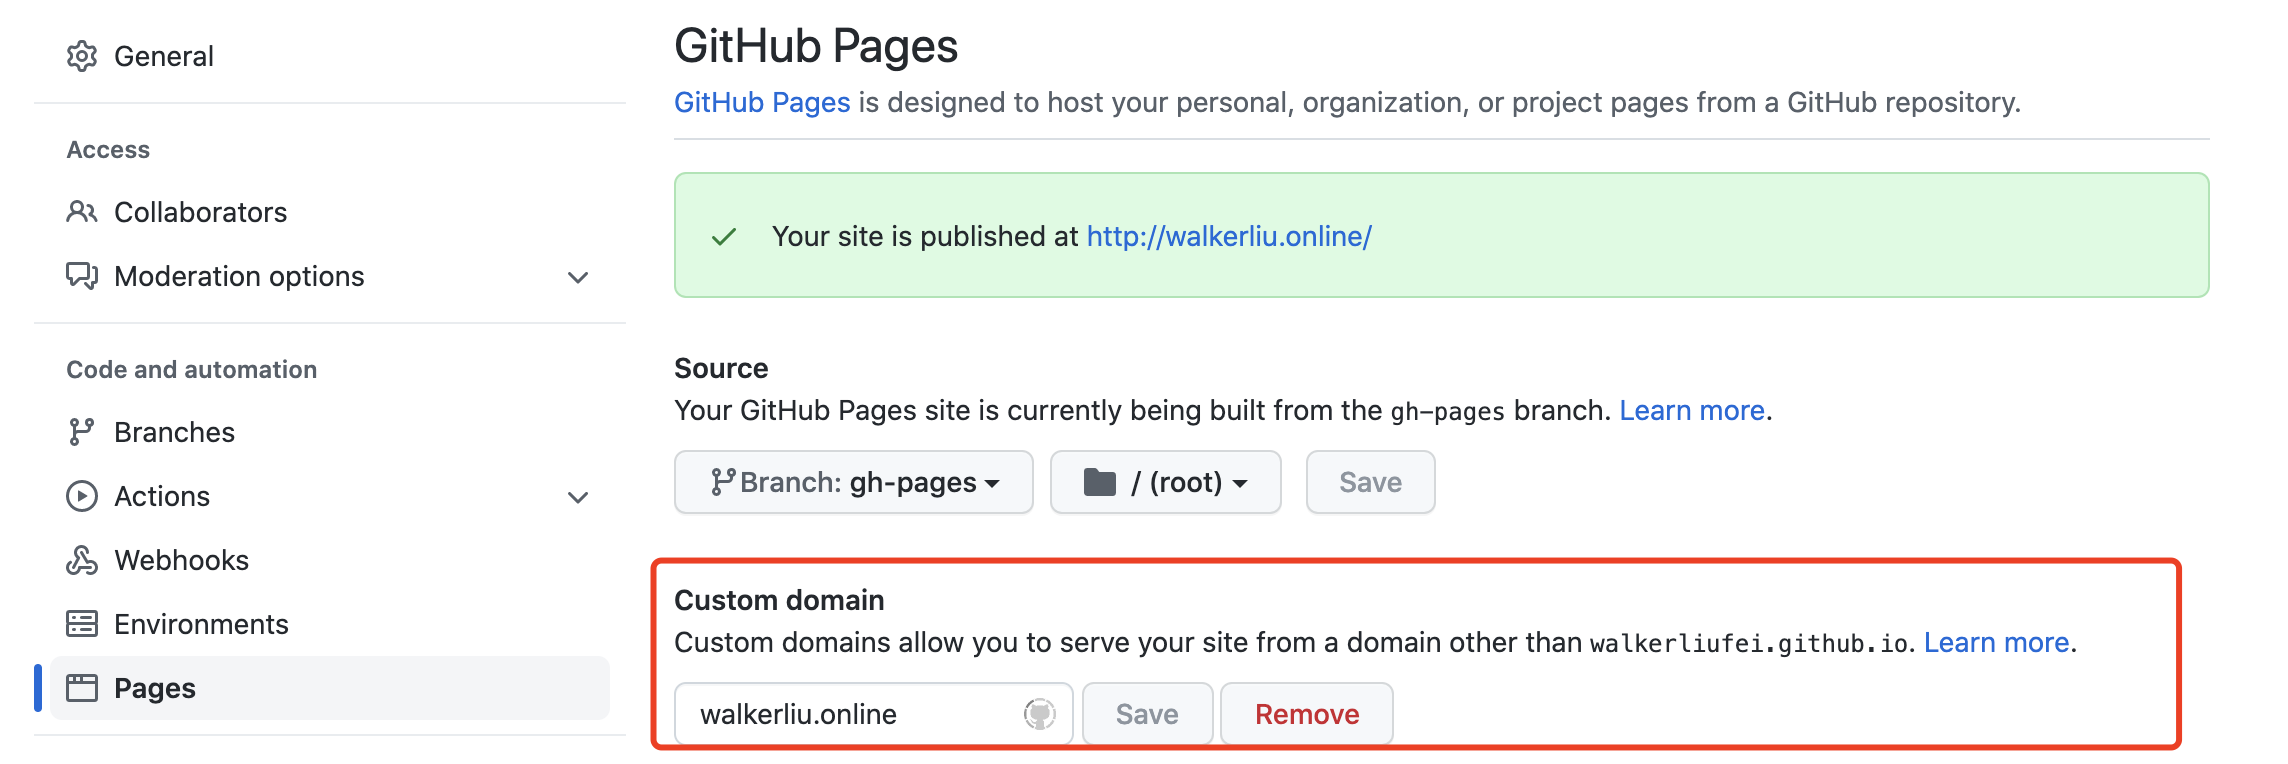
在上面创建github.io 仓库中将Custom domin配置为自行购买的域名,配置完成并保存以后会在generate分支产生一个CNAME文件,在我这个例子中这里就是gh-pages这个分支CNAME文件

然后在云服务提供商哪里将域名CNAME配置到指向另外一个域名即<username.github.io> 这个域名即可。